Triggered segments are segments that contain one or more trigger clauses. These trigger clauses specify a particular event in time, such as a particular date or anniversary, a clickthrough action, or a purchase. Anything else about the member that does not specify exactly when the mailing is to be sent is not a trigger clause, but a "regular" clause.
The result is that the mailing to the segment will automatically be sent when the trigger clause(s) are met. Triggered segments are used in conjunction with triggered or sequential mailings. These mailings allow you to automatically send an anniversary or birthday message, or follow up when someone clicks on a link.
This example shows how to create a simple triggered segment that will send a message on the anniversary someone joined the list.
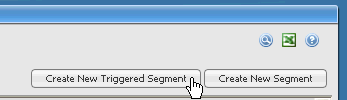
1. In the left Navigation bar, click Segments, and then click the Create New Triggered Segmentbutton.
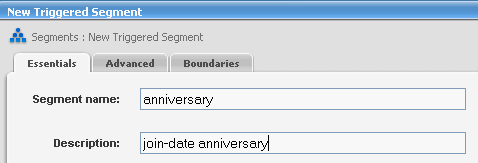
2. In the Segment Name box, type anniversary. Note that there can be no spaces in any segment name.
3. In the Description box, type join-date anniversary.
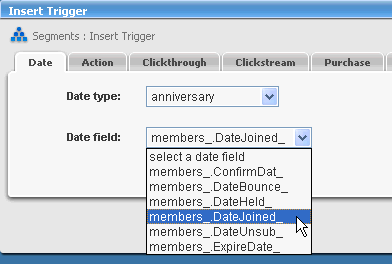
4. Click Insert Trigger.
5. In the Date tab, click the Date Type box, and then select anniversary.
6. Click the Date field box, and then select members_.DateJoined_.
7. Click Insert. The appropriate query appears in the Query box.
8. Click Save and Test.
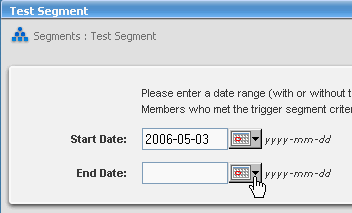
9. On the Test Segment page, specify a date range by entering start and end dates. The members who joined between those dates will be included in your test.
10. Click OK. The next page displays the text of your query and a sample of the addresses that fit your query choices.
To use your triggered segment, you must create a triggered mailing.
  |