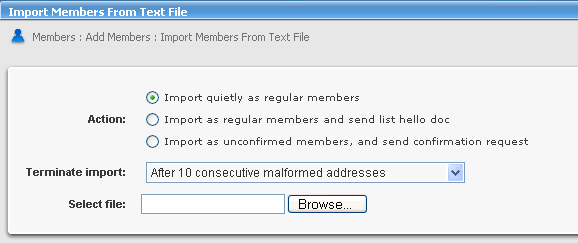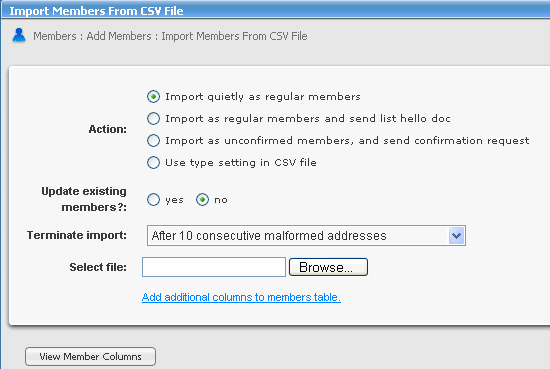
If you already have a list of members, you can import them into ListManager using Members: Add Members. You may import members from a text file, or with additional demographic information using a CSV (comma separated values) file.
Importing Your Members from a Text File
1. On the left Navigation bar, click Members, point to Add Members, and then click Import from Text File.
2. To import members without notification, in the Action section, select the Import Quietly as Regular Members option.

3. In the Select file box, type the name of the file you want to import, or click Browseand navigate to the file you want.
Each email address and name must be on a separate line, and must be in one of the following formats:
bob@example.com
bob@example.com Bob Shelby
bob@example.com (Bob Shelby)
Bob Shelby <bob@example.com>
4. Click Import. The next screen gives you information about your import.
Importing Your Members with Additional Demographic Information
1. On the left Navigation bar, click Members, point to Add Members, and then click Import from CVS File.
2. To import members without notification, in the Action section, select the Import Quietly as Regular Members option.

3. Do one of the following:
To update ListManager with demographic data from a separate database
Next to Update existing members?, select yes.
If you use member profile forms to allow your members to update their data in ListManager
-or
If the file you are uploading does not contain any existing members
Next to Update existing members?, select no.
Note: ListManager will not resubscribe members if you update them.
4. Select the CSV file to upload. A CSV file has the information you would like imported in a CSV (comma separated values) format. The first row of the file tells ListManager which field the data in each column should be imported into. For example:
EmailAddr_,FullName_,Company,Phone
bob@example.com,Bob Shelby,Shelby Corp.,555-555-5555
In this example, EmailAddr_ and FullName_ correspond to the default database fields in for email addresses and full names. Additional fields called "Company" and "Phone" have been added to this members_ table, so this information can also be imported into each member's record.
5. Click Import. You will be taken to a screen which will give you a report of the status of your import.
  |