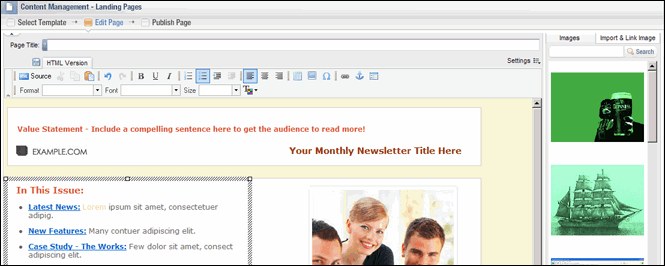
On the Edit Page, you can add a page title and edit the content of your page. You can also insert images from the Asset Library.

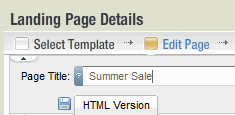
The Page Title
This is what will appear at the top of each landing page in your browser. Limit your name to 200 characters or less.
To create a page title
Click the Page Title field, and the type a title.
To hide the page title
Click the Hide button above the Page Title label.

This gives you more room for the HTML Editor. To show the page title, click the button again.
Inserting Images from the Asset Library
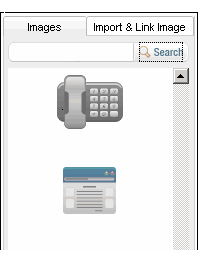
The right side of the Edit Page displays a panel containing assets from the Asset Library. You can insert images from this panel.

Forms
One of the most important features of landing pages is the ability to create a form.
Making the Landing Page Viewable by Search Engines
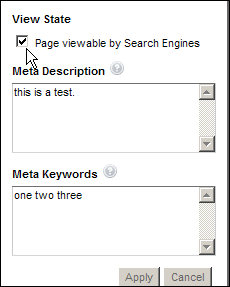
By default, landing pages are not viewable by search engines. You can make them viewable and add a description and keywords to help them achieve a higher ranking in search engine results.
1. Click the Settings command.

2. In the dialog that appears, select Page viewable by Search Engines.

3. In the Meta Description box, type a description of your page (approximately 50 words or less). This is the description that will appear on a search engine page.
4. In the Meta Keywords box, type words or phrases that represent your page (approximately 25 or less words or phrases works best).
5. When you are finished, click the Apply button.
NOTE To learn more about the Meta Description or Meta Keywords sections, move your pointer over the question mark (tooltip) button.
The HTML Editor
In the HTML Editor, you can create new content or edit the content you added when you chose a source on the Select Template page. The Editor works much like a word processor: you type text and then change its format by selecting it and choosing various commands. The difference, of course, is that the Editor produces HTML.
The HTML Editor consists of two main sections:
1. The toolbar.
2. The workspace.
The Toolbar and Workspace
The toolbar contains features that are similar to those found in word-processing or web design programs. You can also do things like add images/ and create web links.

NOTE Your browser may have security settings that prevent you from using some of these buttons. You can use keyboard shortcuts instead (for example, to copy text, press Ctrl+C).
The workspace is the space below the toolbar where you make changes to the template (if you chose one) and/or add new content.
Here are the tasks you can perform using the toolbar:
| Toggle between Source Code view and HTML view |
Click the Source button.
While in Source Code view, you can edit the HTML directly.
|
| Cut an item |
Select the item, and then click the Cut button.
|
| Copy an item |
Select the item, and then click the Copy button
|
| Paste an item from the clipboard |
Click the pointer where you want the item to be located, and then click the Paste button.
|
|
Undo or redo an action |
Click the Undo or Redo button.
|
| Bold / Underline / Italic |
1. Select the text. 2. Click the button to apply the style you want:
|
| Create a Numbered List |
1. Select the text. 2. Click the Insert/Remove Numbered List button.
-or-
To create the list as you type 1. Click the Numbered List button. A "1" appears, indicating the first item in the list. 2. Continue typing. Each time you press Enter, a new line starts that is numbered automatically.
|
|
Create a Bulleted List |
1. Select the text. 2. Click the Bulleted List button.
-or-
To create the list as you type 1. Click the Bulleted List button. A bullet appears, indicating the first item in the list. 2. Continue typing. Each time you press Enter, a new line starts that is bulleted automatically.
|
| Indent / Decrease Indent |
1. Select the text., image or table. 2. Click the Indent button.
You can also click the Indent button first (one or more times), and then type or insert an item.
To decrease indented items 1. Select the items, or (for a single paragraph), click the pointer anywhere in the paragraph. 2. Click the Decrease Indent button one or more times.
|
|
Justification |
1. Select the text, image, or table. 2. Click the button to apply the justification you want:
|
| Insert a table |
1. Click the Insert/Edit Table button.
2. Choose the properties you want. 3. Click OK.
Learn more about table properties.
|
|
Insert an image |
1. Click the Insert/Edit Image button.
2. In the Image Properties dialog, type the URL of the image in the URL field. 3. Enter any other properties you want. You can click the Link and Advanced tabs to choose more properties. 4. Click OK.
Learn more about image properties.
NOTES
Wrong: /img/product.jpg Right: http://example.com/img/product.jpg
|
| Insert a Special Character |
Click the Insert Special Character button, and then choose the character you want.
|
|
Edit an image |
Click the image, and then click the Insert/Edit Image button.
You can also right-click the image and then choose Image Properties.
|
| Create a link |
1. Select the text to change to a link. 2. Click the Insert/Edit Link button.
3. Choose the properties you want. 4. Click OK.
NOTE If the Link button is not active, click anywhere in the white workspace area of the Editor. This should make it active.
|
|
Edit a link |
1. Click the pointer anywhere inside the link. 2. Click the Insert/Edit Link button.
|
| Insert an anchor |
Click the Insert/Edit Anchor button.
|
| Insert a form |
Click the Insert Form button.

Learn more about adding and editing forms.
|
|
Format (Style) |
1. Select the text. 2. Click the Format drop-down list, and then choose the HTML style you want.
|
|
Font |
1. Select the text. 2. Click the Font drop-down list, and then choose the font you want.
|
|
Size |
1. Select the text. 2. Click the Size drop-down list, and then choose the size you want.
|
| Text Color |
1. Select the text. 2. Click the Text Color button, and then choose the color you want for the text. In the dialog that appears, you can click More Colors and then create a custom color.
|
|
To show or hide the toolbar |
Click the arrow on the left side of the toolbar.
|
When you are finished with the Edit Page, click the Continue button.
