When you don’t want a member to receive email, you can put them on the Suppression List or the Blacklist. The lists have one major difference:
Tip: For information about working with suppression lists in Lyris HQ, see About Suppression Lists.
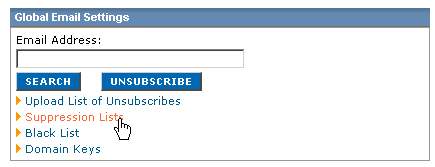
1. In the classic EmailLabs interface, go the Account Home page
2. Under Global Email Settings, click Suppression Lists.

3. In the Suppression Lists window, click in the New Suppression List Name box, type a name, and then click Create Suppression List.
4. Follow the instructions on the page to add members.
1. On the Suppression Lists page, click the Download command for the list you want.
2. Follow the instructions on the page to download.
While you are scheduling a message for delivery, click the Suppression List box, and then select the Suppression List you want.
Note: You can have more than one Suppression List and apply a different one to each message. You can only apply one Suppression List to any particular message.
On the Account Home page under Global Email Settings, click Blacklist.
1. In the Blacklist Settings window, click the text box on the right, and then type the address you want.

2. Click Add to List.
1. In the box on the left, select the address you want.
2. Click Remove from list.
Note: You can use the asterisk (*) as a wildcard to add all email addresses in a domain to your Blacklist. For example, to restrict emails from the domain "aol.com," type *@aol.com.