
Some of the functions from the Message Screen:
A program is similar to an email campaign. The combination of a keyword and short code constitute a program. Programs must be setup by your Lyris Account Manager. Once a program has been set up, you may add one or more messages to the program.

1. From the right side of the Messages screen, click Add .
Step one of the Message Create wizard, Message Details, appears.
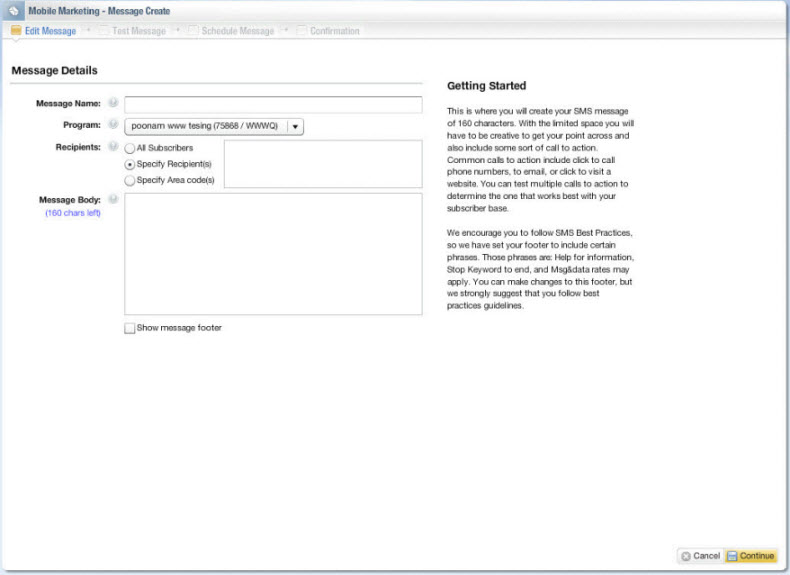
2. In step one, Edit Message, enter the Message Name.
3. Select a program from the pulldown menu next to the Program label.
4. Enter Recipients. Specify if you wish the message to be sent to All Subscribers, Specific Recipient(s), or Specific Area Code(s).
5. Enter the Message Body (or text).
Note: Message Name, Recipients, and Message Body are required fields.
6. If you wish to have a message footer , click the Show Message Footer box at the end of the Message Details screen. This causes the Message Footer text box to appear. Type in the text you wish to appear at the bottom of your text message.
7. Click Continue on the bottom right of the screen.
Step two of the Message Create wizard, Test Message, appears.
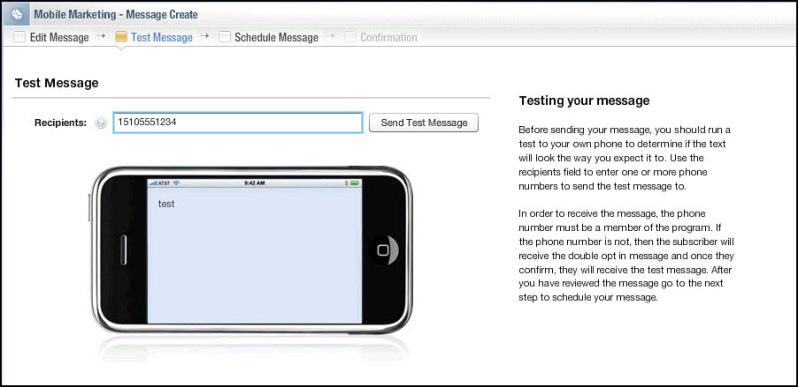
8. Enter a mobile phone number to which you would like to receive the test message.
9. Click Continue in the lower right corner of the screen.
Step three of the Message Create wizard, the Schedule Message screen, appears.
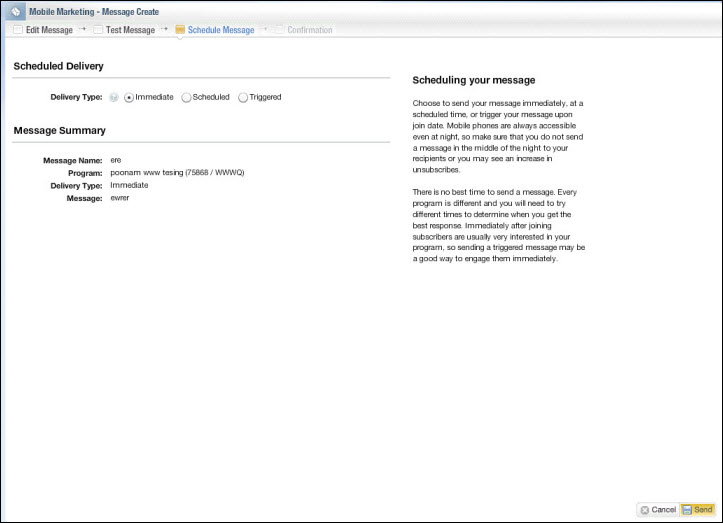
10. Choose when you would like to schedule the delivery of the message, Immediate, Scheduled, or Triggered; (see Delivery Type section below for different delivery types of scheduled messages ), and click Send.
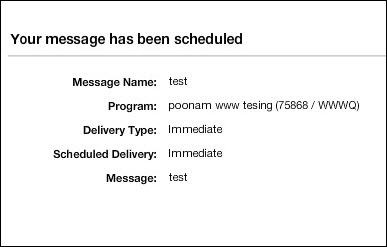
A screen appears confirming that your message has been scheduled to be sent.
1. Select a message of status draft, scheduled, or triggered.

2. Click Edit.
Step one of the Message Create wizard, Message Details, appears.
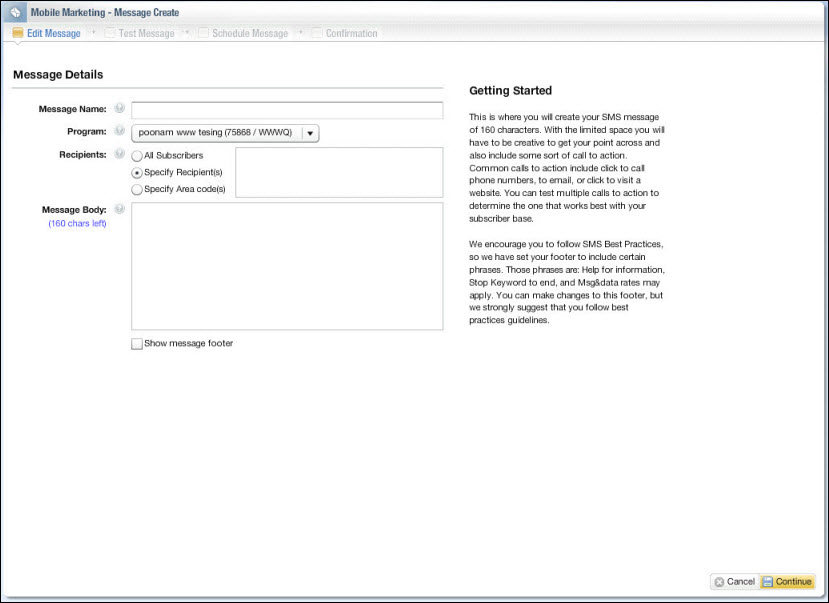
3. You can edit the message body or message name, change recipients as well as edit the message footer.
4. If you wish to have a message footer, click the Show Message Footer box at the end of the Message Details screen. This causes the Message Footer text box to appear. Type in the text you wish to appear at the bottom of your text message.
5. Once you have completed editing a message, click Test Message at the top of the screen.
A dialog box appears to confirm that you want to save your changes.

6. Click OK to save the changes you have made.
Step two of the Message Create wizard, Test Message, appears.

1. Enter a mobile phone number which you would like to receive the test message in the Recipients field.
2. Click Continue in the lower right corner of the screen.
Step three of the Message Create wizard, the Schedule Message screen, appears.

3. Choose when you would like to schedule the delivery of the message, Immediate, Scheduled, or Triggered, (see Delivery Type section below for different delivery types of scheduled messages), and click Send.
A screen appears confirming that your message has been scheduled to be sent.
1. To Schedule a Message enter step three of the Message Create wizard by either adding a new message or editing an existing message.
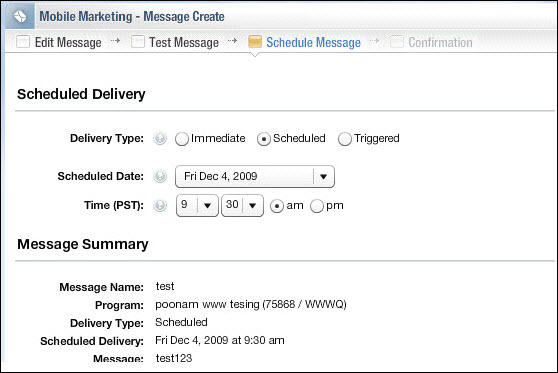
2. If you would like to schedule delivery for a day in the future, click the drop-down arrow next to the Scheduled Date field.
A calendar appears for you to schedule the future date of delivery.
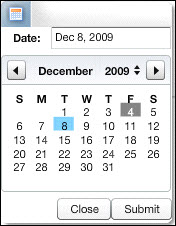
3. Choose a date and click Submit.
4. Click Schedule in the lower right corner of the Scheduled Delivery screen.

A screen appears confirming that your message is scheduled to be sent on the future date.
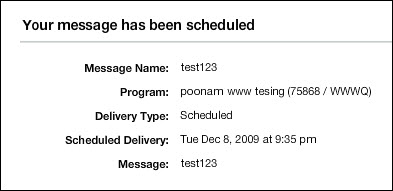
Click Close in the lower right corner of the scheduled message confirmation screen, and you will return to the main message screen.
Note that your message scheduled for future delivery has a status of Scheduled.

Also note that the Stop button is now activated on the upper section of the screen.

To schedule delivery of your message, you may select one of three delivery types. The following scheduled delivery types appear in the Scheduled Delivery screen:
Immediate – Click the Immediate radio button next to the Delivery Type field. Your message will be sent immediately
Scheduled – Click the Scheduled radio button next to the Delivery Type field. Your message will be sent at a scheduled date and time. This will give you the option of setting the scheduled date and time to send your message. Click the Scheduled Date pulldown menu. A calendar appears .

Use the Time pulldown menus to select the hour, minute, am, and pm values. Then click Submit at the bottom right corner of the screen. A confirmation screen appears confirming that your message has been scheduled to be sent at your specified date and time. Additionally, the Delivery Type of Scheduled and Send Date for your message will appear under the Delivery Type for that message in the Messages screen.
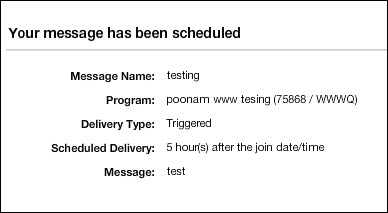
Triggered – Click the Triggered radio button next to the Delivery Type field. Your message will be sent at a time interval after the subscriber’s join date and time. Click the second(s) pulldown in the Trigger Message field. You will be given the options of second(s), minute(s), hour(s), day(s) after the subscriber’s join date to send the message. Select the time, and then click save at the bottom right of the screen. A confirmation screen appears confirming that your message has been scheduled to be sent at the specified time after the subscriber has joined. Additionally, the delivery type of Triggered and Send Date for your message will appear under the Delivery Type for that message in the data grid of the Messages screen.
A Draft Delivery Type is a text message that has been written and tested but has not been sent yet.
You can stop message delivery anytime before the scheduled message date and time of delivery
1. Select the message which has a future delivery date.
2. Click Stop.
Notice the message status has changed to Stopped.

With the Triggered option, you can send a message at a certain interval (second, minute, hour, or day) after the subscriber's join date.
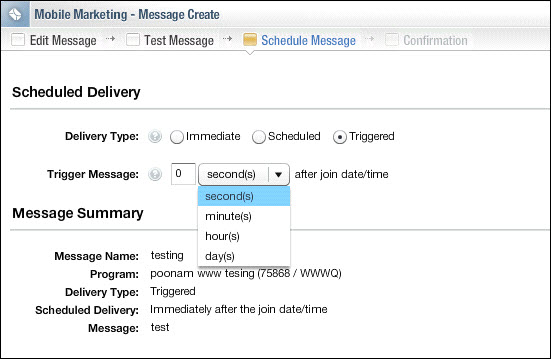
1. From the Scheduled Delivery screen, select the Triggered option.
2. Select a time period when to trigger a message send.
3. Click Save in the lower right corner of the screen.

A confirmation of your triggered message appears.
Proceed to SMS Reports.