ODBC on Windows
ODBC for Importing/Syncing from PostreSQL to MSSQL
1. Download, extract, and run the MSI installer on the ListManager machine. At the time of this writing, this download was available at http://gborg.postgresql.org/project/psqlodbc/genpage.php?downloads.
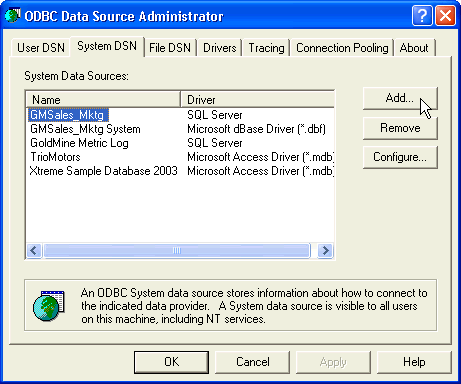
2. To configure the driver, In the left Navigation bar, click to Start->Settings->Control Panel->Administrative Tools, and then click on Data Sources (ODBC).
3. Under System DSN, select Add.
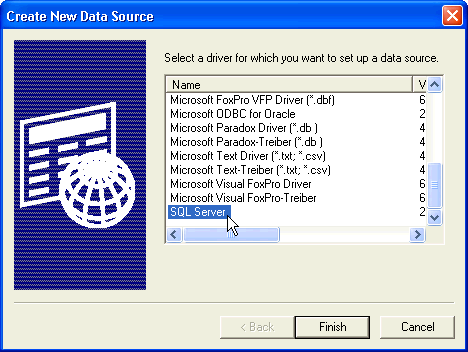
4. Find the PostgreSQL driver (should be near the bottom).
5. Fill in the required information (server, database, username, password, description, datasource name)
6. Make sure that you have the proper settings in the pg_hba.conf file to allow the ODBC machine to connect to the PostgreSQL database server host. Example:
host all all 56.232.32.171 255.255.255.255 password
7. To test the connection, create a Link Table in Microsoft Access:
8. Start Access.
9. Select "Blank Access Database".
10. Enter a filename for the database to use (e.g., db2.mdb).
11. Under Objects in the left hand panel, make sure the Tables button is selected.
12. Right click in the blank area under the "Create table by entering data" link, and select "Link Tables".
13. Go to the "Files of type" dropdown and select "ODBC Databases()".
14. In the "Select Data Source" window, click on the "Machine Data Source" tab, highlight your postgreSQL data source, and click "OK".
15. The tables in your PostgreSQL database should be available to you. Select the table you are interested in, and the primary key(s) for the table when prompted.
16. You should be able to double click on the new link (with the Earth icon) and see the contents of the table, or you can create a query in the Query section using the Query Wizard.
ODBC for Importing/Syncing from MSSQL to MSSQL
1. To open Data Sources (ODBC), click Start, point to Settings, and then click Control Panel.
2. Double-click Administrative Tools, and then double-click Data Sources (ODBC).
3. Click the System DNS tab, and then click Add.
4. In the Create New Data Source dialog, click SQL Server (you may have to scroll down to see it), and then click Finish.
5. In the Create a New Data Source to SQL Server dialog, click the Name box, and then type the name you want. Do the same for the Description box.
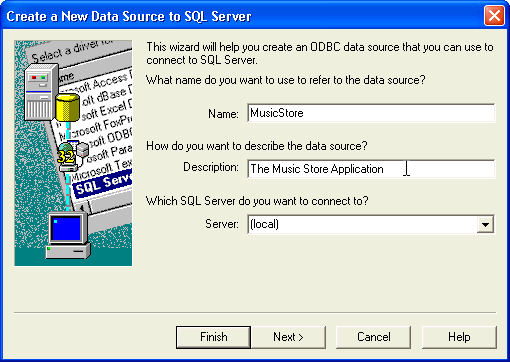
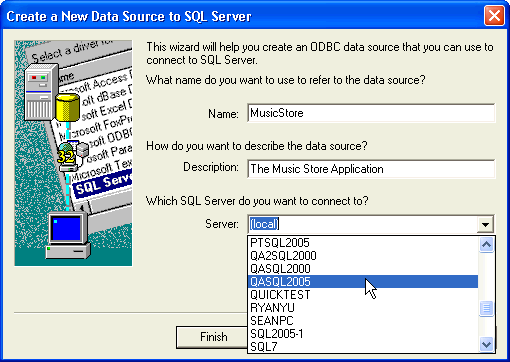
6. In the Server box, click the down arrow, and then select the server that hosts the database you entered in the Name box. When you are finished, click Next.
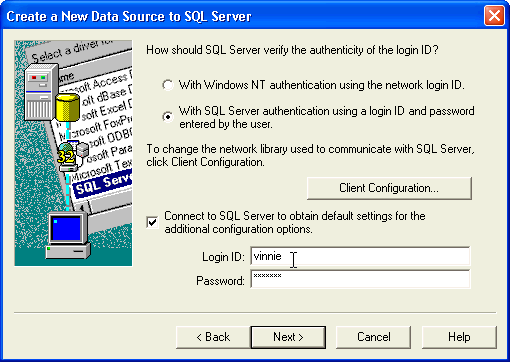
7. In the next dialog, select the option With SQL Server authentication using a login ID and password entered by the User.
8. Type in your Login ID and Password, and then click Next.
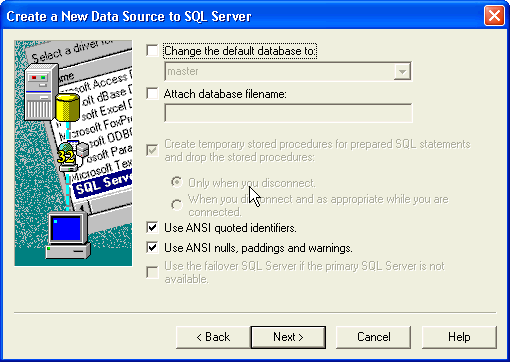
9. In the next dialog, make no changes. Click Next.
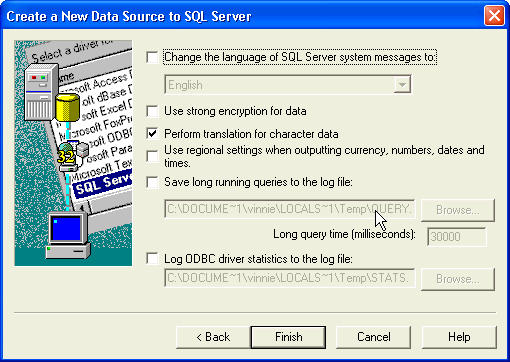
10. In the next dialog, make no changes. Click Finish.
11. A summary of your previous selections displays. To verify successful ODBC Data Source creation, click Test Data Source.
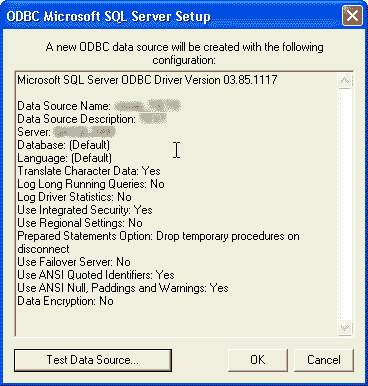
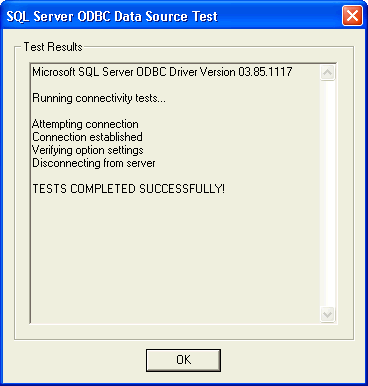
12. If you run a test and it is successful, a screen similar to the one below appears. Click OK.
More
1. ODBC
1. ODBC on Unix
2. ODBC on Windows
3. Sample ODBC Connection Strings and Queries

 |