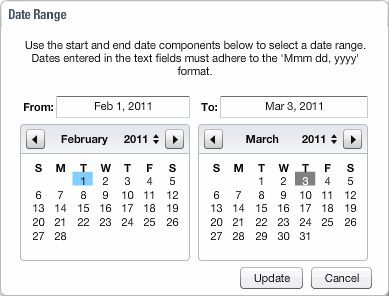
There are a number of places in Lyris HQ where you can use the Date Range dialog to choose a date range for a particular report.
The date range in Search Marketing
To choose a date range
In the upper right of the screen, click the Date Range field.

The Date Range dialog appears.

To choose a new date range using the Start and End fields
1. Click the Start field and then either edit the date or delete it and then type a new one.

2. Use the same choice of methods to change the End field.
To choose a new date range using the calendar
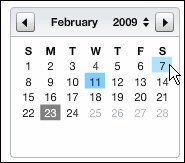
1. Select a start date in the calendar on the left:


2. Use the same choice of methods to select an end date in the calendar on the right.
To save your date range and close the Date Range dialog
Click the Update button.

The Date Range in Search Marketing
When you set the date range in LHQ/Search Marketing, keep the following in mind:
1. The default range is the last seven days available for the search engine account(s).
2. You can only set a date range that is valid for every account on the screen. For example, let's say you have two accounts: Account 1 has data for the last ten months, and Account 2 has data for the last three months. The maximum data range you can set is three months.
3. If you switch to a different screen, and the date range is valid for that screen, it will stay the same. If it is not valid, it will change to the default (i.e., the last seven days available).
4. The date range applies to both the graph and the Metrics table.