You are here: Email Marketing / EmailLabs > Members/Contacts--Lyris HQ > Designating Proof Contacts

Designating Proof Contacts

You can send a message to your proof contacts to find out exactly how the message will appear in recipients' inboxes.

You can designate any contact as a proof contact either when creating or editing a contact or when testing a message.

ClosedHow do you know if a contact is already a proof contact?
ClosedHow do you know which contacts in a list are proof contacts?

To create a proof contact when adding a contact

  1. On the Add Contact page, select the Proof Contacts checkbox.

Tip: For more information about adding a contact, see Adding a Contact.

To create a proof contact when editing a contact

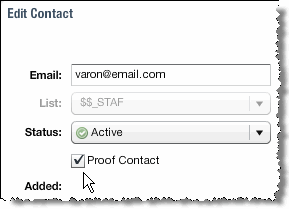
  1. On the Edit Contact page, select the Proof Contacts checkbox.

Tip: For more information about editing a contact, see Editing a Contact.

To create a proof contact when testing a message

1. Open the Edit Message page.

2. Do one of the following:

The Test Message page opens.

3. Select the Send Proof tab.

The Proof Contacts list opens, showing all existing Proof Contacts.

4. Click Add Proof Contact.

An empty row appears in the Proof Contacts list.

5. Type the contact's email address in the empty row.

To no longer use the contact as a proof contact

You can remove the contact as a proof contact from the Edit Contact, Add Contact, or Test Message page.

From the Edit Contact or Add Contact page:


From the Test Message page:

  1. Point at the contact and click x.